Interactive menu
Use this block to configure the interactive voice menu. Based on this menu, you can create different branches of the scenario depending on a customer’s response.
Contents
Configuring system output settings
- Connect the block via the Fail port.
- Double-click the Interactive menu block.
- In the Output settings, select how you want to generate the system's speech: you can use the text-to-speech option (voice synthesis) or an audio recording.
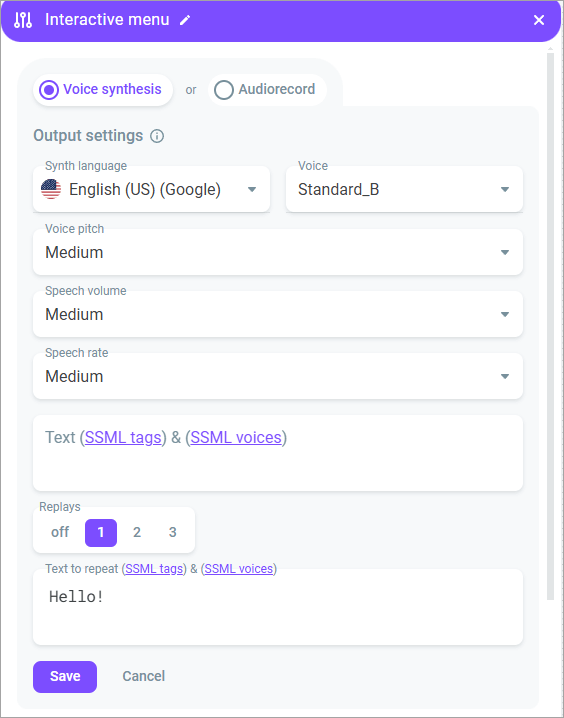
- If you select the Voice synthesis option, configure the following parameters:
Synth language - Select the language for synthesizing speech from text.
Voice - Select one of the artificial voices to pronounce the text.
Text - Enter the text you want to deliver to customers. You can use SSML tags.
Replays - If required, specify how many times the text should be pronounced (1-3).
Text to repeat - Enter the alternative text if you want the scenario to repeat a different version.
For specific TTS-providers, you can also configure advanced settings:
Voice pitch - Configure the synthesized voice pitch (Google). Available options: x-low, low, medium, high, x-high, default.
Speech volume - Set the speech volume (Google). Available options: silent, x-soft, soft, medium, loud, x-loud, default.
Speech rate - Set the synthesized speech speed (Google, Yandex). Available options: x-slow, slow, medium, fast, x-fast, default.
Emotions - Configure the synthesized voice sentiment (applicable for specific Yandex voices). Available options: neutral, good, evil.
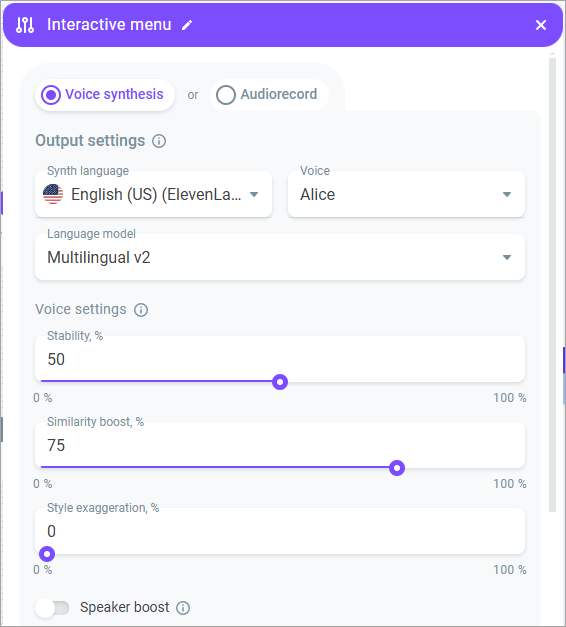
If you select the ElevenLabs TTS-provider, additional speech synthesis settings are available:
Language model - The model understands which language you use and generates audio accordingly.
Stability - Allows you to adjust the degree of the voice emotionality. The higher the stability, the more restrained and calm the voice becomes. Lowering the setting introduces a broader emotional range.
Similarity boost - Allows you to adjust the level of clarity and similarity of the voice. If similarity is set too high, the AI may reproduce artifacts from low-quality audio.
Style exaggeration - Allows you to amplify the style of the original speaker.
Speaker boost - When enabled, allows you to make TTS speech sound more human-like. Enabling the setting may slightly increase the speech synthesis time.
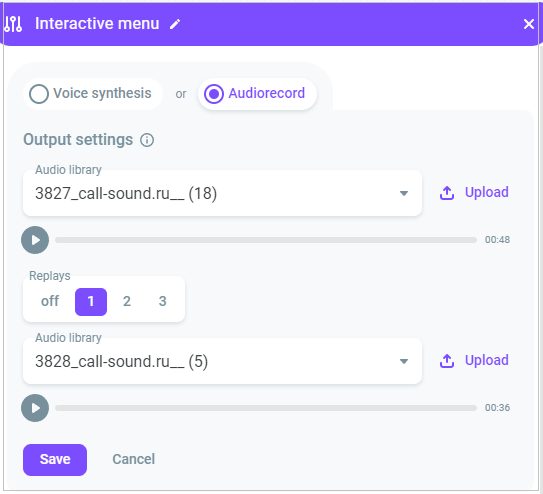
- If you select the Audiorecord option, choose an audio recording from the library or upload an audio file from your PC. If required, define the number of replays (1-3) and select a different audio recording.
- Click Save.
Configuring customer input settings
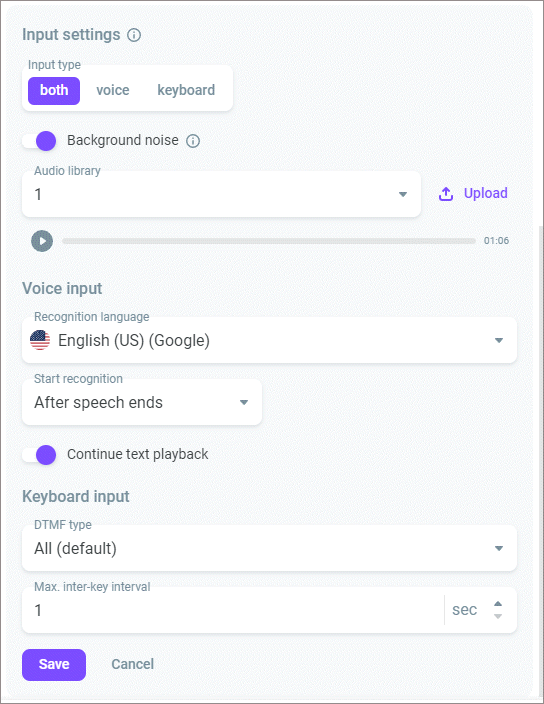
- In the Input settings section, select the type of a customer response input: keyboard (DTMF) or voice (ASR). You can use both options simultaneously.
- Enable the Background noise switch to play background sounds to fill in the gaps between the robot’s phrases. Select an audio recording from the drop-down list or upload a media file from your PC.
- If you select the voice option, configure the following:
Select the Recognition language you expect from a customer.
Define when exactly the recognition should start:
After speech ends - Recognition starts immediately after speech synthesis or audio recording playback stops.
After speech starts - Recognition starts N seconds after speech synthesis or audio recording playback starts (from 1 to 20 seconds). The option implies the ability to interrupt the recording or synthesis.
Before speech ends - Recognition starts N seconds before speech synthesis or audio recording playback stops (from 1 to 20 seconds). The option implies the ability to interrupt the recording or synthesis.
Enable the Continue text playback switch if you want the system to continue playing text when it fails to recognize customer input.
Customer response messages are saved to the {{CALL.IVR_RESULT_X}} variable, where Х is the number of block repetitions (from 1 to 4). The variable is reset when entering each new Interactive menu block, so if you want to save the response, you need to add it as a new variable in the Data modification block.
- If you select the keyboard input, configure the following:
Select the type of DTMF-signals.
Define the maximum inter-key interval.
- Click Save.
Configuring customer possible responses
In the Responses section, configure possible customer responses. You can add up to 20 ports with anticipated responses, based on which you can set up additional branches of the scenario. The system searches for matches sequentially through the ports (from 1 to 20), allowing you to manage the priority of responses.
Example: The system dials the customer and plays an audio recording offering the subscriber to change their mobile tariff plan. The system compares the received response with the expected response in port 1. If there are no matches, the customer's response is compared with the response in port 2, and so on, until the system finds a match. Upon discovering a match, the scenario develops according to the further settings, and the call moves on to the next block depending on the received response.
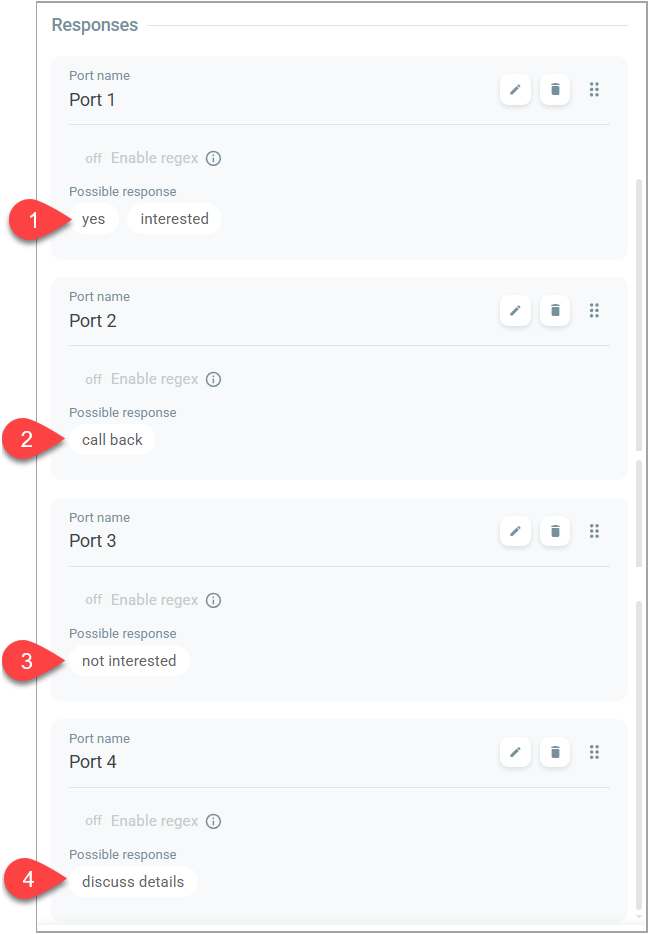
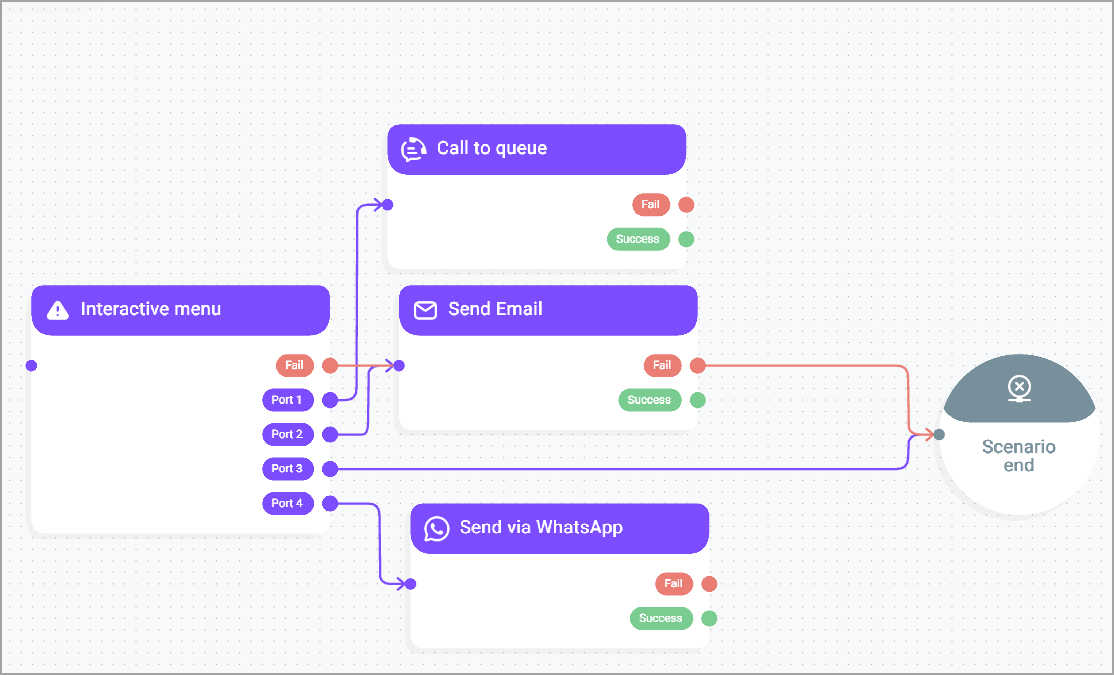
To add expected responses, do the following:
- Click Add response.
- Enter the Port name.
- In the Response key field, select a response key you expect from a customer. This field is available if you select the keyboard or both input type.
If you need to find not just one but a combination of digits in a customer response, use a regular expression (see more details below).
- In the Possible responses field, enter a response you expect from a customer. This field is available if you select the voice or both input type.
If you need to add several possible responses in one field, use Enter or the separator (|).
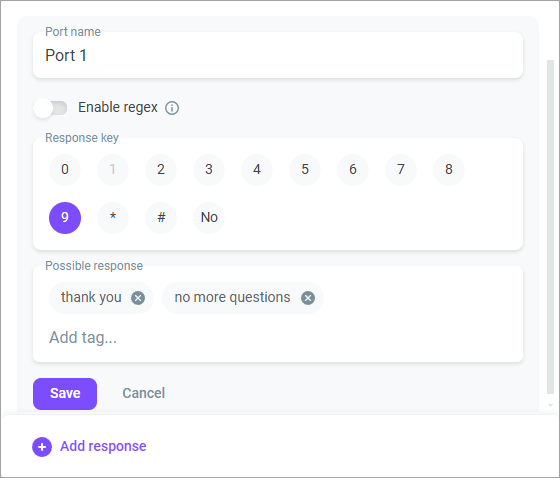
- Toggle the Enable regex switch so that the system uses regular expressions to search for the desired information in customer responses.
Regular expressions are special patterns that allow you to find and process text fragments. For example, you can use them to search for specific words, numbers, or even entire phrases in customer responses. When you enable this setting, you can define specific rules the system then uses to search for text.
Use the following format in a regular expression: /pattern/flags. Where:
pattern- is the pattern you want to use for searching. For example, if you want to find words containinghi, your pattern will look like/hi/.flags- are additional parameters that can alter the behavior of the search. For instance, theiflag makes the search case-insensitive (if you enter the regular expression/hi/i, bothHiandhiare considered the same).
Example
If you want to find all customer responses that contain
10, enter/10/in your regular expression.If you want to find all mentions of the word
catin customer responses, your regular expression might look like this:/cat/i, where/cat/is the pattern itself andiis the flag indicating case insensitivity. The system finds all responses containingcat, for example category, locator, catalog, educate.If you want to find only specific words in customer responses, such as
good|excellent|well, use the following syntax:/(^|\\s)(good|excellent|well)(\\s|$)/gi. Where(^|\\s)denotes the beginning of a line, while(\\s|$)denotes the end of a line or a space. The system finds responses that contain only the separate wordsgood|excellent|well.
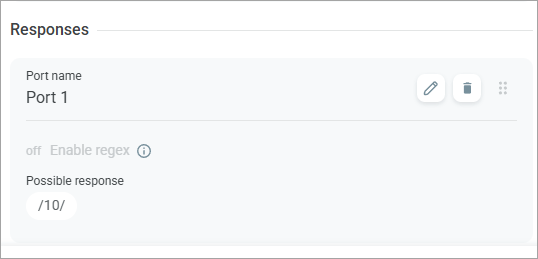
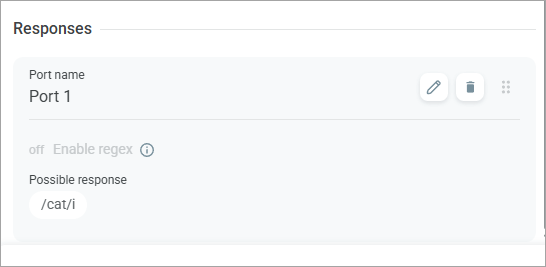
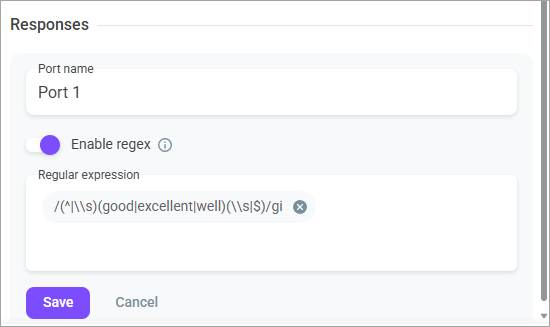
You can add only one regular expression. If you want to use a regular expression, all previously added responses are deleted. Incorrect use of regular expressions may affect your scenario.
- Click Save.
